How To Create a Pong Game - Part 2
Part 2 | Creating the Player and CPU Paddles
Hi 👋
If you’ve just stumbled upon this and aren’t sure what is happening, this is the second chapter of How To Create a Pong Game from scratch with MonoGame.
You can read the first chapter by clicking here.
Creating The Paddle
By the end of this project, you will have two gameplay options:
- Player (left paddle) vs. Player (right paddle)
- Player vs. CPU
Yes, we’ll implement a very simple IA to play against us.
Both paddles will essentially share the same behavior, with the exception of the AI functionality for the right paddle.
Instead of duplicating the same code for both paddles (left and right), we’ll create a single Paddle class
and then inherit from it.
To get started, create a class called Paddle.cs and define the following structure:
public class Paddle
{
public RectangleF Bounds;
protected Vector2 Velocity;
protected Texture2D Texture;
public Paddle(Texture2D texture, Vector2 position)
{
Texture = texture;
Velocity = Vector2.Zero; // same as: `new Vector2(0f, 0f)`
Vector2 textureSize = texture.Bounds.Size.ToVector2();
Bounds = new RectangleF(position, textureSize);
}
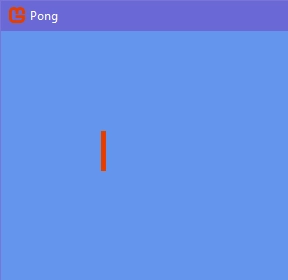
public virtual void Draw(SpriteBatch sb, Texture2D pixel)
{
sb.Draw(pixel, Bounds.ToRectangle(), Color.MonoGameOrange);
}
}
Let’s begin with this structure.
The Bounds property is the rectangle we’ll use to detect collisions with our paddles.
Notice that we’ve create a Draw method that expects an instance of SpriteBatch as a parameter, and
we’re using our Bounds to draw the paddle.
If you don’t remember, we can rescale any image by passing a native Rectangle as parameter
instead of a Vector2.
Here, we’re passing our RectangleF as a parameter and calling the ToRectangle method we created earlier.
The virtual keyword means this method can be overrideen in a subclass. You’ll understand this concept better later.
The Velocity property is where we’ll apply the acceleration and deceleration before adding it to Bounds.Position,
rather than modifying the bounds position directly.
Notice that this property is marked as protected. This means it can only be accessed by classes that
inherit from Paddle, i.e., subclasses.
The Texture property will hold the paddle’s texture.
Finally, in the Draw method, after the SpriteBatch parameter, there’s a Texture2D pixel parameter. This texture will
be very useful for debugging purposes. We’ll pass the 1x1px image we used earier to test our rectangle,
allowing us to visualize where our Bounds are and how it looks.
Instantiating the Paddle and Drawing the Sprite
Let’s test it out.
We will use this sprite for the paddle:

In the main class, create a reference to the Paddle class and instantiate it:
public class Game1 : Game
{
    ...
    private Paddle paddle;

    ...
    protected override void LoadContent()
    {
        ...
        Texture2D paddleTexture = Content.Load<Texture2D>("paddle");
        paddle = new Paddle(paddleTexture, new Vector2(100f, 100f));
    }
}
Now, let’s draw it:
...
protected override void Draw(GameTime gameTime)
{
    ...
    _spriteBatch.Begin();

    paddle.Draw(_spriteBatch, whitepixel);

    _spriteBatch.End();
    ...
}
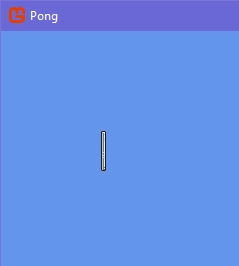
Now, let’s test:
It seems that our bounds are being properly defined, but we can’t see our sprite. Why?
That’s because we haven’t defined the logic to draw the sprite in the Draw method of the Paddle class;
we’ve only defined how to draw the bounds.
...
public virtual void Draw(SpriteBatch sb, Texture2D pixel)
{
    sb.Draw(pixel, Bounds.ToRectangle(), Color.MonoGameOrange);
}
To fix this, it’s very simple: just add another call to the Draw method of the SpriteBatch, passing the Texture property as
an argument. Also, change the color to Color.White to prevent the sprite from being colored orange (unless you want this):
...
public virtual void Draw(SpriteBatch sb, Texture2D pixel)
{
    sb.Draw(pixel, Bounds.ToRectangle(), Color.MonoGameOrange);
    sb.Draw(Texture, Bounds.ToRectangle(), Color.White); // drawing the sprite
}
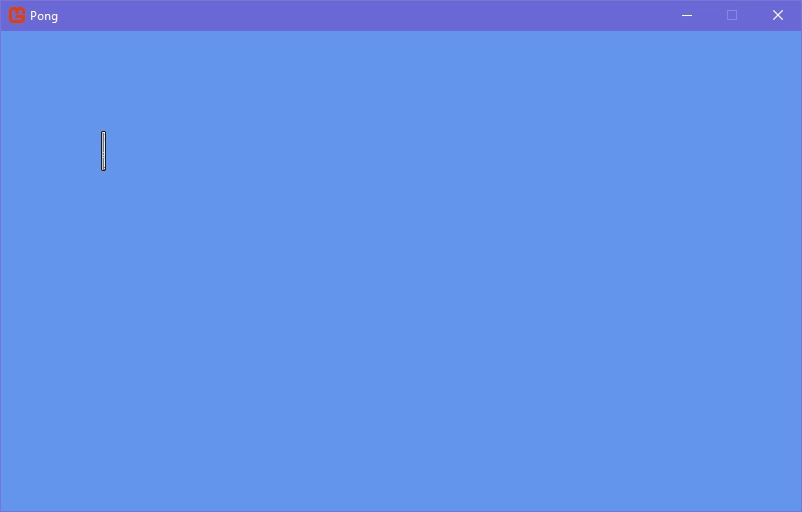
Now, let’s test:
Rescaling the Paddle
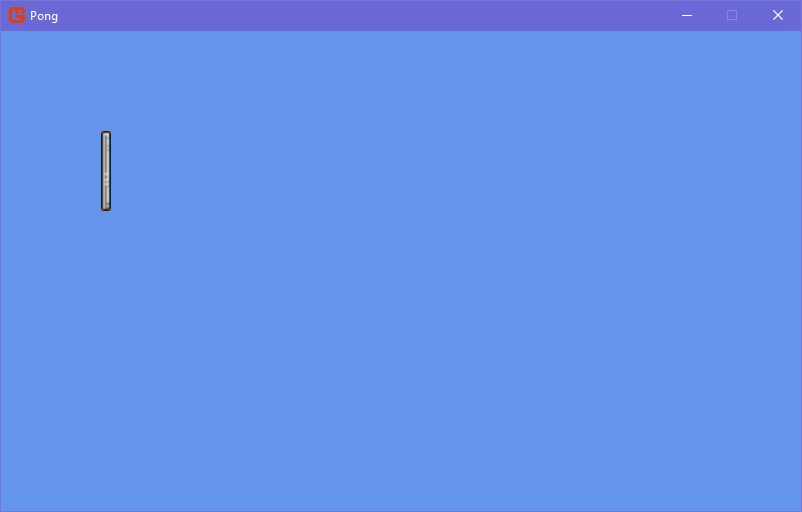
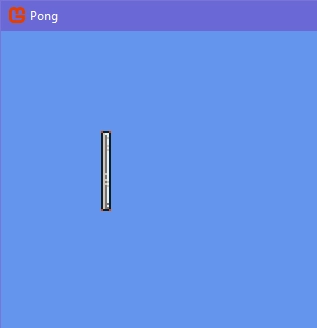
You may have noticed that the paddle appears quite small compared to the window size:
Since we are passing our bounds as parameter to the Draw method to render the sprite, we can easily resize the paddle by
applying a multiplier when defining its bounds:
public class Paddle
{
    ...
    public Paddle(Texture2D texture, Vector2 position)
    {
        ...

        Vector2 textureSize = texture.Bounds.Size.ToVector2();
        Bounds = new RectangleF(position, textureSize * 2f);
    }
    ...
}
Testing now:
Perfect, but there are two issues:
- The sprite appears blurry.
- We will need to apply a multiplier of 2 to almost every object in our game.
Sprite Appears Blurry
The SpriteBatch.Begin method includes many parameters that we can configure. For example, we can change the draw order of images, apply a transformation matrix to simulate a camera, or (what we need in this case) adjust how images are filtered.
By default the SpriteBatch draws sprites using LinearClamp SamplerState.
For now, all you need to know is that this is what makes our sprite appear blurry.
To fix this, simply set the samplerState parameter to SamplerState.PointClamp:
...
protected override void Draw(GameTime gameTime)
{
    ...
    _spriteBatch.Begin(samplerState: SamplerState.PointClamp);
    ...
}
Testing now:
Perfect, the first issue has been resolved.
Setting a Scale Globally
Now we just need to refactor our code. Since we’ll use the same multiplier multiple times, it would be better if we could change the scale in one place and have it affect everything (that uses this scale factor)
Let’s make a small update to the constructor of our Paddle class:
public Paddle(Texture2D texture, Vector2 position, float scale)
{
    ...
    Bounds = new RectangleF(position, textureSize * scale);
}
Then in our main class, let’s define a scale attribute and use it when declaring our paddle instance:
public class Game1 : Game
{
    ...
    private float scale;
    ...
    protected override void Initialize()
    {
        scale = 2f;
    }
    protected override void LoadContent()
    {
        ...
        paddle = new Paddle(paddleTexture, new Vector2(100f, 100f), scale);
    }
}
If you test the project now, nothing will change, as expected.
Yes, you can also set the
scaleattribute insideLoadContentif you prefer.
Centering the Paddle
First, we’ll store the size of our screen in a attribute:
public class Game1 : Game
{
    ...
    public Vector2 ScreenSize;
    ...
    protected override Initialize()
    {
        ...
        ScreenSize = GraphicsDevice.Viewport.Bounds.Size.ToVector2();
    }
}
Why do we define our ScreenSize variable as public? Because later, when we start building the UI, we’ll need to
access the attributes of the main class. In other words, we’ll pass the Game1 class entirely as reference to the UI.
Another point is that we’re getting the window size through the Viewport of the GraphicsDevice. In short,
the Viewport provide the bounds of the screen where we draw things, and these bounds are returned as a Rectangle structure.
The Rectangle structure offers two useful properties: Location (similar to the Position of our RectangleF, but defined as
Point instead of a Vector2) and Size (also defined as a Point). As we saw in the previous chapter, you can convert
a Point structure to a Vector2 structure (or vice-versa) by calling the ToVector2() (or ToPoint, in the case of Size being a Vector2).
If this declaration seems confusing, you can write it like this instead:
public class Game1 : Game
{
    ...
    public Vector2 ScreenSize;
    ...
    protected override Initialize()
    {
        ...
        ScreenSize = new Vector2(_graphics.PreferredBackBufferWidth, _graphics.PreferredBackBufferHeight);
    }
}
In the Snake game guide we set the _graphics.PreferredBackBufferWidth
and _graphics.PreferredBackBufferHeight to change the window size. Here we are just retrieving their default values.
If you want to check what value is stored in this variable, simply pass it as an argument to Console.WriteLine:
protected override void Initialize()
{
    ...
    Console.WriteLine(ScreenSize);
}
And testing:
You can also print the Rectangle and Point structures in the console, thanks to the ToString
method that these structures override.
Now, to center our paddle on the screen, it’s very simple.
We can do this:
...
protected override void LoadContent()
{
    ...
    paddle = new Paddle(paddleTexture, Vector2.Zero, scale);
    paddle.Bounds.Position = new Vector2(15f, ScreenSize.Y / 2f);
}
...
If we test it now:
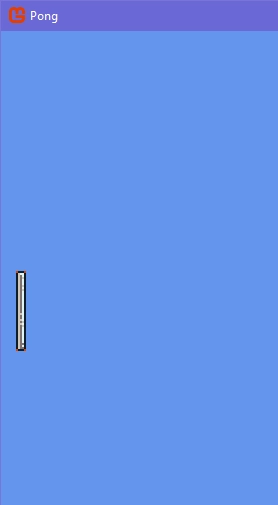
You probably noticed that the paddle isn’t exactly in the center. This happens because, similarly to what we saw when
positioning the snake in the Snake game guide, Bounds.Position also positions the paddle by the top-left corner.
Another thing you may have noticed is that we defined the position using paddle.Bounds.Position instead of just paddle.Position.
Why? Because we haven’t defined a getter and setter for this property in our Paddle class. Let’s fix that.
Go to the Paddle class and add the following:
public class Paddle
{
    ...
    public Vector2 Position
    {
        get => Bounds.Position;
        set => Bounds.Position = value;
    }
    ...
}
Now we can update this declaration:
...
protected override void LoadContent()
{
    ...
    paddle.Position = new Vector2(15f, ScreenSize.Y / 2f);
}
...
If you test, you should get the same result as before.
However, i wont’t will use this approach because
Bounds.Positionmakes it clearer that we are modifying the Bounds itself.
Ok, but let’s actually center the paddle. To do this, we just need to move the paddle up half of his height:
...
protected override void LoadContent()
{
    ...
    paddle.Bounds.Position = new Vector2(
        15f - paddle.Bounds.Size.X / 2f,
        ScreenSize.Y / 2f - paddle.Bounds.Size.Y / 2f
    );
}
...

Perfect, but notice one thing:
...
paddle.Bounds.Position = new Vector2(
    15f - paddle.Bounds.Size.X / 2f,
    ScreenSize.Y / 2f - paddle.Bounds.Size.Y / 2f
);
...
What we are doing is setting the position of the bounds to a value and subtracting half of the paddle’s size from this value.
This is very similar to what we defined in the setter of the Center property in our RectangleF:
public class RectangleF
{
    ...
    public Vector2 Center
    {
        get => Position + Size / 2f;
        set => Position = value - Size / 2f;
    }
    ...
}
Then, we can just update our declaration to this:
...
protected override void LoadContent()
{
    ...
    paddle = new Paddle(paddleTexture, Vector2.Zero, scale);
    paddle.Bounds.Center = new Vector2(15f, ScreenSize.Y / 2f);
}
...
If you test, you should get the exact same result.
I told you this property would be very useful.
Moving the Paddle
Alright, let’s implement movement for our paddle.
We need to implement an Update method in our class and call it:
// Paddle.cs
public class Paddle
{
    ...
    public virtual void Update()
    {
    }
}

// Game1.cs
public class Game1 : Game
{
    ...
    protected override void Update(GameTime gameTime)
    {
        ...
        paddle.Update();
        ...
    }
    ...
}
Accelerating
Now, let’s define three properties: acceleration, friction (or deceleration) and maxSpeed as protected:
public class Paddle
{
    protected float Acceleration;
    protected float Friction;
    protected float MaxSpeed;
    public Paddle()
    {
        ...
        Acceleration = 0.25f;
        Friction = 0.25f;
        MaxSpeed = 7f;
    }
    ...
}
and inside the Update method, write this:
...
public virtual void Update()
{
    if (KeyboardManager.IsKeyDown(Keys.W))
    {
        if (Velocity.Y > 0f)
            Velocity.Y = 0f;

        if (Velocity.Y > -MaxSpeed)
            Velocity.Y -= Acceleration;
    }
    else if (KeyboardManager.IsKeyDown(Keys.S))
    {
        if (Velocity.Y < 0f)
            Velocity.Y = 0f;

        if (Velocity.Y < MaxSpeed)
            Velocity.Y += Acceleration;
    }

    Bounds.Position += Velocity;
}
...
If we test:

What we are doing here is the following: while W (or any other key you chose) is pressed, we increase Velocity.Y by Acceleration, and later we add to the Position of the bounds the velocity.
Here’s an illustration of this process:
/* Definitions:
 *   Acceleration = 0.25f
 *   Velocity.Y = 0f
 *
 * Instruction:
 *   Velocity.Y += Acceleration
 *   Bounds.Position += Velocity.Y
 *
 * Frame 0:
 *   Velocity.Y = 0.25f (0 + 0.25)
 *   Bounds.Position = 0.25f (0 + 0.25f)
 *
 * Frame 1:
 *   Velocity.Y = 0.50f (0.25f + 0.25)
 *   Bounds.Position = 0.75f (0.25f + 50f)
 *
 * Frame 2:
 *   Velocity.Y = 0.75f (0.50 + 0.25)
 *   Bounds.Position = 1.25f (0.75f + 50f)
 *
 * ...
 */
if (Velocity.Y > 0f) and if (Velocity.Y < 0f) are necessary to avoid that when changing the direction, the Velocity.Y
increases (or decreases) until it reaches 0 before moving in the opposite direction.
Try commenting both ifs and test:
...
public virtual void Update()
{
    if (KeyboardManager.IsKeyDown(Keys.W))
    {
        // if (Velocity.Y > 0f)
        //     Velocity.Y = 0f;

        ...
    }
    else if (KeyboardManager.IsKeyDown(Keys.S))
    {
        // if (Velocity.Y < 0f)
        //     Velocity.Y = 0f;

        ...
    }
    ...
}
...
You can quickly turn a line into a comment by pressing Ctrl + K and then CTRL + C in both VSCode and Visual Studio. To uncommenting, just press Ctrl + K and then Ctrl + U.
if (Velocity.Y > -MaxSpeed) and if (Velocity.Y < MaxSpeed) guarantee that the speed doesn’t increase beyond the MaxSpeed.
That is: Velocity.Y will increase until it reaches 7 (or -7 if it’s decreasing).
Also, comment these two conditions and see for yourself what happens:
...
public virtual void Update()
{
    if (KeyboardManager.IsKeyDown(Keys.W))
    {
        ...

        // if (Velocity.Y > -MaxSpeed)
            Velocity.Y -= Acceleration;
    }
    else if (KeyboardManager.IsKeyDown(Keys.S))
    {
        ...

        // if (Velocity.Y < MaxSpeed)
            Velocity.Y += Acceleration;
    }
    ...
}
...
Decelerating
To decelerate the paddle until it stops, we just need to do the opposite of what we did to accelerate:
...
public virtual void Update()
{
    if (KeyboardManager.IsKeyDown(Keys.W))
    {
        ...
    }
    else if (KeyboardManager.IsKeyDown(Keys.S))
    {
        ...
    }
    else
    {
        if (Velocity.Y > 0f)
        {
            Velocity.Y -= Friction;
            if (Velocity.Y < 0f)
                Velocity.Y = 0f;
        }
        else if (Velocity.Y < 0f)
        {
            Velocity.Y += Friction;
            if (Velocity.Y > 0f)
                Velocity.Y = 0f;
        }
    }
    ...
}
...
Testing:

What we are doing is: first, we check the direction in which the paddle is accelerating and then, we “accelerate” in the opposite direction. The if (Velocity.Y < 0f) and if (Velocity.Y > 0f) ensure that Velocity.Y will reach exactly 0.
Now, let’s create just one more method to constrain the paddle within the screen because when we move up or down, we might go beyond the screen limits.
To do this, we need to know the height of the screen. If you remember, we defined a ScreenSize property in the main class. Let’s
create a new property in the Paddle class and pass ScreenSize as an argument during the instantiation:
// Paddle.cs
public class Paddle
{
    ...
    protected Vector2 ScreenSize;
    public Paddle(Texture2D texture, Vector2 position, float scale, Vector2 screenSize)
    {
        ...
        ScreenSize = screen;
    }
}

// Game1.cs
public class Game1 : Game
{
    ...
    protected override void LoadContent()
    {
        ...
        paddle = new Paddle(paddleTexture, Vector2.Zero, scale, ScreenSize);
        ...
    }
    ...
}
To make sure that the
ScreenSizeproperty within thePaddleclass is properly defined, just pass it as an argument to theConsole.WriteLine.
Ok, now let’s implement our new method:
public class Paddle
{
    ...
    protected void ConstrainToScreenBounds()
    {
        if (Bounds.Top < 0f)
            Bounds.Top = 0f;

        if (Bounds.Bottom > ScreenSize.Y)
            Bounds.Bottom = ScreenSize.Y;
    }
}
And let’s call it at the end of the Update method:
...
public virtual void Update()
{
    ...

    ConstrainToScreenBounds();
}
...
Run your project and try to go beyond the screen:

Creating the Player Paddle
Ok, essentially we created the base of our paddles.
Now let’s create another class called PlayerPaddle and inherit from Paddle:
public class PlayerPaddle : Paddle
{
    public PlayerPaddle(Texture2D texture, Vector2 position, float scale, Vector2 screenSize)
        : base(texture, position, scale, screenSize)
    {

    }
}
And later, update the Paddle property in the main class replacing it with PlayerPaddle:
public class Game1 : Game
{
    ...
    // before: private Paddle paddle;
    private PlayerPaddle playerPaddle;
    ...
    protected override void LoadContent()
    {
        ...
        // before: paddle = new Paddle(...);
        playerPaddle = new PlayerPaddle(paddleTexture, Vector2.Zero, scale, ScreenSize);
        ...
    }
    protected override void Update(GameTime gameTime)
    {
        ...
        // before: paddle.Update();
        playerPaddle.Update();
        ...
    }
    protected override void Draw(GameTime gameTime)
    {
        ...
        // before: paddle.Draw(...);
        playerPaddle.Draw(_spriteBatch, whitepixel);
        ...
    }
}
If you run your game now, everything should be exactly as before.
Creating the Opponent Paddle
Create a new class called CPUPaddle and inherit from Paddle in the same way we did for the PlayerPaddle.
Then, instantiate and initialize it in the main class:
public class Game1 : Game
{
    ...
    private CPUPaddle cpuPaddle;
    ...
    protected override void LoadContent()
    {
        ...
        cpuPaddle = new CPUPaddle(paddleTexture, Vector2.Zero, scale, ScreenSize);
        cpuPaddle.Bounds.Center = new Vector2(ScreenSize.X - 15f, ScreenSize.Y / 2f);
    }

    protected override void Update(GameTime gameTime)
    {
        ...
        cpuPaddle.Update();
        ...
    }
    protected override void Draw(GameTime gameTime)
    {
        ...
        cpuPaddle.Draw(_spriteBatch, whitepixel);
        ...
    }
}
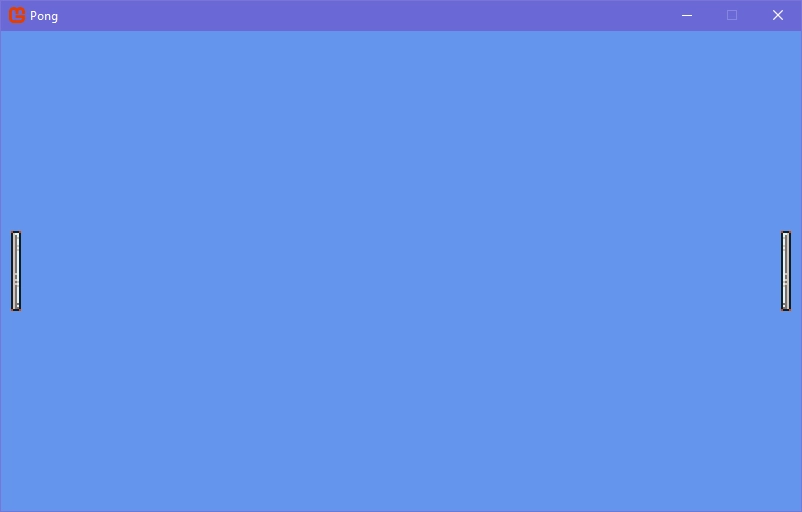
If we test now:
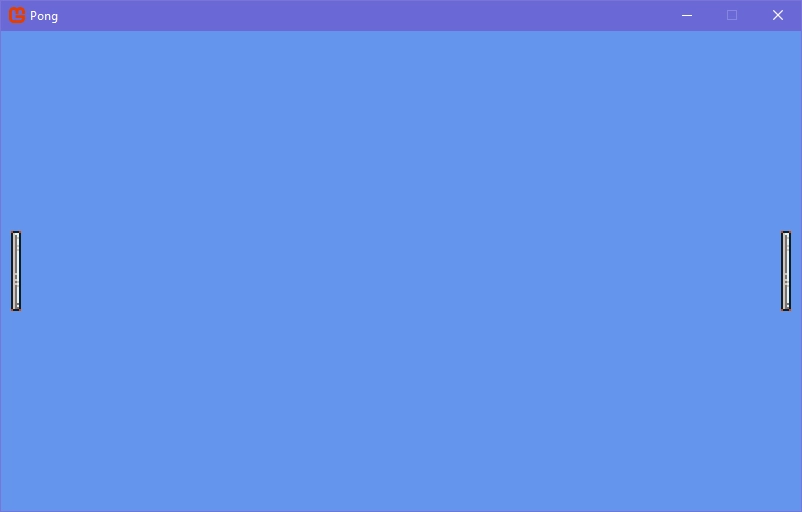
Cool, but we have two problems:
- The opponent paddle’s sprite is rotated in the wrong direction
- When we press W or S (or the key you defined to move the paddle), both paddles are moving in the same direction.
Flipping the Opponent Paddle
Do you remember i told that SpriteBatch.Begin has many useful parameters we can set to change things? Well, the
SpriteBatch.Draw
also has several overloads with useful parameters beyond just (Texture, Rectangle, Color). For example, we can set the SpriteEffects of the current Draw call to flip the image.
Go to the Paddle class file, and updates the Draw method:
public virtual void Draw(SpriteBatch sb, Texture2D pixel)
{
    ...
    // previous
    // sb.Draw(Texture, Bounds.ToRectangle(), Color.White);

    // updated
    sb.Draw(Texture, Bounds.ToRectangle(), null, Color.White, 0f, Vector2.Zero, SpriteEffects.None, 0f);
}
Ok, if you run your project now, visually, nothing should change.
Now, replace SpriteEffects.None with SpriteEffects.FlipHorizontally and test:
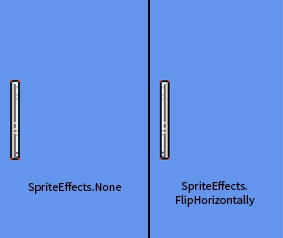
Ok, this is exactly what we’re looking for. But you may have already realized that if we change this parameter directly in the
Draw method of the Paddle class, it will affect all classes that inherit from this one.
To fix this, we will create a protected method that we can call when we want to flip the paddle.
Let’s set two class attributes: a IsFlipX as bool and another as SpriteEffects, and then pass the SpriteEffects attribute
to sb.Draw, replacing the literal declaration:
public class Paddle
{
    ...
    protected bool IsFlipX { get; private set; }
    private SpriteEffects spriteEffects;
    public Paddle()
    {
        ...
        spriteEffects = SpriteEffects.None;
    }
    public virtual void Draw(SpriteBatch sb, Texture2D pixel)
    {
        ...
        sb.Draw(Texture, Bounds.ToRectangle(), null, Color.White, 0f, Vector2.Zero, spriteEffects, 0f);
    }
    ...
}
Let’s implement the method to flip the texture:
...
protected void FlipX()
{
    IsFlipX = !IsFlipX;
    spriteEffects = IsFlipX ? SpriteEffects.FlipHorizontally : SpriteEffects.None;
}
...
If you didn’t know, just like you can check if a boolean variable or expression is false just by using a exclamation mark, we can also use it to invert any boolean value.
For example, !IsFlipX flips the boolean value of the attribute (if it is true, it becomes false; otherwise, it becomes true).
The expression expression ? if true : if false is called a ternary expression
(in this case, a ternary declaration). We are setting the value of SpriteEffects in just one line, according to the value of IsFlipX.
Here’s the process:
- Flip the value of
IsFlipX - Set
spriteEffectstoSpriteEffects.FlipHorizontallyifIsFlipXis true; otherwise, set it toSpriteEffects.None.
Now, another thing you probably noticed is that the IsFlipX attribute was defined as protected and has { get; private set; }. The last declaration ({ get; private set; }) means that we can get the current value of IsFlipX from any class that inherits from Paddle, but
we can only change its value directly from the Paddle class. This can be very useful later if you want to made something
and need to know if the paddle is flipped or not.
Now, after that, go to the CPUPaddle class and, inside the constructor, call the FlipX Method:
...
public class CPUPaddle : Paddle
{
    public CPUPaddle(Texture2D texture, Vector2 position, float scale, Vector2 screenSize)
        : base(texture, position, scale, screenSize)
    {
        FlipX();
    }
}
And test:
Moving Each Paddle With Different Keys
Ok, now we need to fix the problem where, when pressing W or S, both paddles being moved to the same direction.
To solve this, let’s move all the code related to the paddle movement and into a new method:
public class Paddle
{
    ...
    public virtual void Update()
    {

        ConstrainToScreenBounds();
    }

    protected void Move()
    {
        if (KeyboardManager.IsKeyDown(Keys.W))
        {
            ...
        }
        else if (KeyboardManager.IsKeyDown(Keys.S))
        {
            ...
        }
        else
        {
            ...
        }

        Bounds.Position += Velocity;
    }
}
Ok, now let’s add two parameters of type Keys to this method:
...
protected void Move(Keys upKey, Keys downKey)
...
Now, inside the method implementation, replace the argument of the IsKeyDown method with what we just defined:
...
protected void Move(Keys upKey, Keys downKey)
{
    if (KeyboardManager.IsKeyDown(upKey))
    {
        ...
    }
    else if (KeyboardManager.IsKeyDown(downKey))
    {
        ...
    }
    ...
}
...
Nice, now in both the PlayerPaddle and CPUPaddle classes, we need to override the Update method inherited from the Paddle
class and call Move, passing the desired key to each paddle:
// PlayerPaddle.cs
public class PlayerPaddle : Paddle
{
    ...
    public override void Update()
    {
        Move(Keys.W, Keys.S);

        base.Update();
    }
}

// CPUPaddle.cs
public class CPUPaddle : Paddle
{
    ...
    public override void Update()
    {
        Move(Keys.Up, Keys.Down)

        base.Update();
    }
}
If we test now:
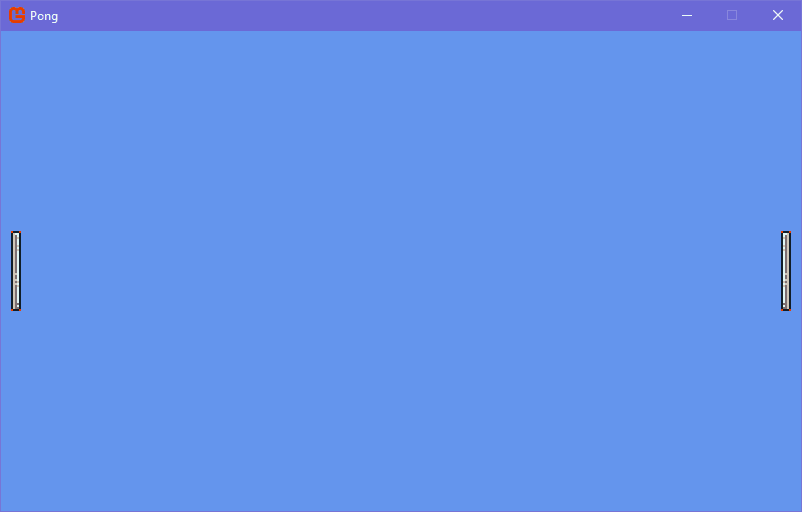
Perfect, now both paddles are moving independently.
Note that even we try to move them beyond the screen limits, they don’t go.
This is because when we moved the code related to the paddle movement from the Update method into
its own method, we kept the call to the ConstrainToScreenBounds method. And when overriding
the Update method in each paddle, we’re calling base.Update.
Here’s the process:
- Call the
Movemethod. - Execute any default code that the
Updatemethod from thePaddleclass (the base class) already has.
If you call base.Update before Move, the paddle will first try to reposition itself and then move.
Try it yourself: move
base.Updateone line before theMovemethod and test to see what happens.
End
Perfect, this is all we need for now.
If you managed to get this far with everything working well, then… Congratulations 🎉
You are ready the next part:
Click to read Part 3 | Creating the Ball and Paddle Effect
🔮 Any question or suggestion, send me a message at:
👾 You can find the source code on Github