How To Create a Pong Game - Part 3
Part 3 | Creating the Ball and Paddle Effect
Hi 👋
If you’ve just stumbled upon this and are unsure what’s going on, this chapter is a larger series on How To Create a Pong Game from scratch with MonoGame.
You can read the previous chapter by clicking here.
Creating the Ball
I will use this sprite

Let’s create a new class, similar to what we did with our paddles, and set some properties:
...
public class Ball
{
    private Vector2 screenSize;
    private Vector2 velocity;
    public RectangleF Bounds { get; private set; }
    private float moveSpeed;
    private Texture2D texture;
    public Ball(Texture2D texture, Vector2 screenSize, float scale)
    {
        this.texture = texture;
        this.screenSize = screenSize;

        Bounds = new RectangleF(Vector2.Zero, texture.Bounds.Size.ToVector2() * scale);
        moveSpeed = 4f;
        velocity = new Vector2(-1f, -1f);
    }
}
The moveSpeed property determines how fast the ball will move.
The velocity vector, defined as (-1f, -1f), means that the ball will initially move toward the top-left corner.
Here’s what we’ll do: we’ll multiply the velocity vector by moveSpeed and then add it to Bounds.Position.
First, let’s draw our ball:
...
public void Draw(SpriteBatch sb, Texture2D pixel)
{
    sb.Draw(pixel, this.Bounds.ToRectangle(), Color.MonoGameOrange);
    sb.Draw(texture, this.Bounds.ToRectangle(), Color.White);
}
...
Now, in the main class:
public class Game1 : Game
{
    ...
    private Ball ball;
    ...
    protected override void LoadContent()
    {
        ...

        Texture2D ballTexture = Content.Load<Texture2D>("ball");
        ball = new Ball(ballTexture, ScreenSize, scale);
        ball.Bounds.Center = ScreenSize / 2f;
    }
    ...
    protected override void Draw(GameTime gameTime)
    {
        ...
        ball.Draw(_spriteBatch, whitepixel);
        ...
    }
}
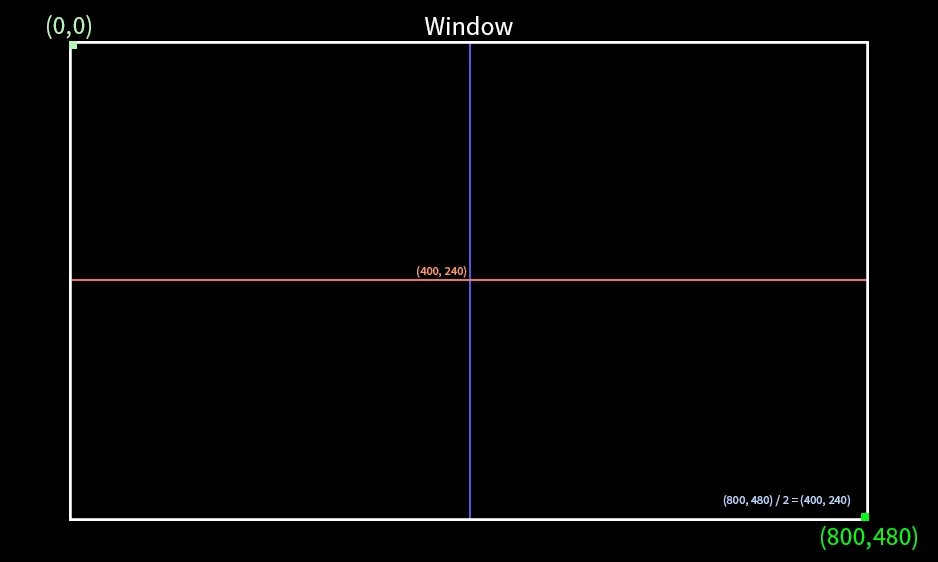
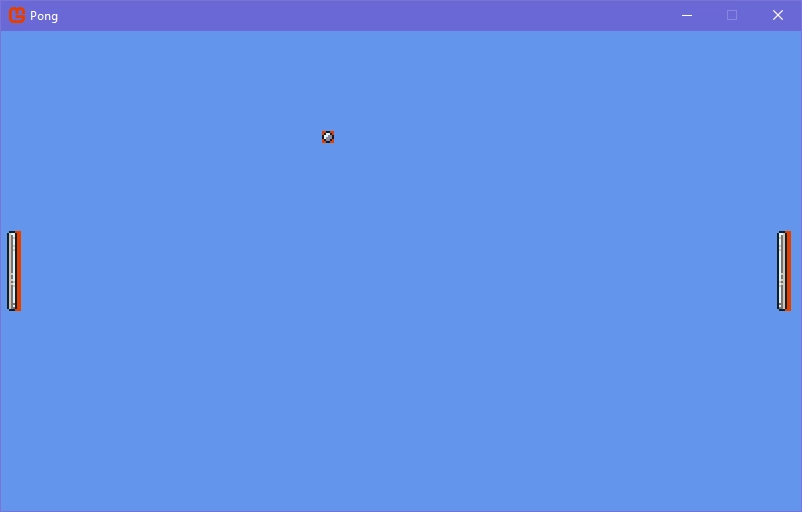
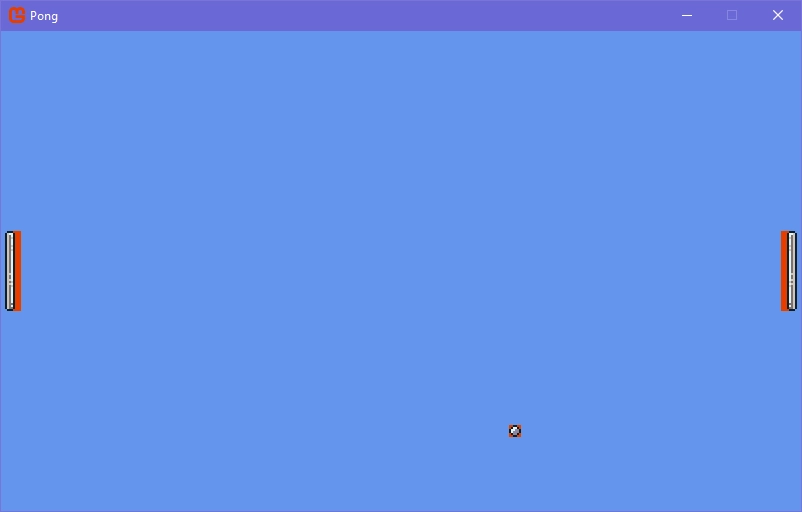
Notice the line ball.Bounds.Position = ScreenSize / 2f. If screenSize contains the width and height of the screen, and the top-left corner is
represented as (0,0), then the bottom-right corner would be (screen width, screen height). Dividing this size by 2 gives us the exact center
of the screen:
Moving the Ball
First, let’s implement what i mentioned earlier:
public class Ball
{
    ...
    public void Update()
    {
        Bounds.Position += velocity * moveSpeed;
    }
    ...
}
Make sure to call
ball.Updatein the main class!
Inverting the Y-Axis When Hitting Top and Bottom Screen Edges
Alright, the ball is moving, but it’s going off the screen. Let’s make it bounce downward when hitting the top edge and upward when hitting the bottom edge:
...
public Ball(Texture2D texture, Vector2 screenSize, float scale)
{
    ...
    velocity = new Vector2(-0.25f, -1f);
}
public void Update()
{
    Bounds.Position += velocity * moveSpeed;

    if (Bounds.Top < 0f || Bounds.Bottom > screenSize.Y)
        velocity.Y *= -1f;
}
...
Notice that i also adjusted velocity.X to -0.25f instead of -1f, just to observe how the ball bounces
vertically (on both top and bottom edges of the screen):
Inverting the X-Axis When Hitting a Paddle
Now, that the ball is bouncing vertically, let’s make it bounce horizontally when it hits a paddle:
We have two ways to do this:
- Pass references to the paddles to the ball.
- Handle this logic in the main class.
I’ll chose the first approach because i believe the ball should handle what happens it collides with a paddle.
Alright, let’s references for both PlayerPaddle and CPUPaddle, and assign them in the main class:
// Ball.cs
public class Ball
{
    ...

    private Paddle playerPaddle;
    private Paddle cpuPaddle;

    public Ball(Texture2D texture, Vector2 screenSize, float scale, Paddle playerPaddle, Paddle cpuPaddle)
    {
        ...
        this.playerPaddle = playerPaddle;
        this.cpuPaddle = cpuPaddle;
        ...
    }
    ...
}

// Game1.cs
public class Game1 : Game
{
    ...
    protected override void LoadContent()
    {
        ...
        ball = new Ball(ballTexture, ScreenSize, scale, playerPaddle, cpuPaddle);
        ...
    }
    ...
}
Notice that i defined the reference properties as Paddle instead of CPUPaddle and PlayerPaddle. This is possible because
both paddles are subclasses of Paddle, and we don’t need any specific property from them, except for Bounds which is
defined in both classes.
public class Ball
{
    ...
    public Ball(Texture2D texture, Vector2 screenSize, float scale, Paddle playerPaddle, Paddle cpuPaddle)
    {
        ...
        velocity = new Vector2(-1f, -1f);
    }
    public void Update()
    {
        ...

        if (Bounds.Intersects(playerPaddle.Bounds) && velocity.X < 0f ||
            Bounds.Intersects(cpuPaddle.Bounds) && velocity.X > 0f)
            velocity.X *= -1f;
    }
    ...
}
First, Bounds.Intersects(playerPaddle.Bounds) && velocity.X < 0f checks if there is an intersection
between the ball’s bounds and the playerPaddle’s bounds and also verifies if the ball is moving
to the left. If both conditions are true, it means the ball touched the paddle,
so the velocity.X is flipped, causing the ball to move in the opposite direction.
We perform the same operation with the cpuPaddle.
Note that i set the x-axis of the velocity back to -1 again:
Resetting the Position and Going to a Random Direction
Now, let’s make the ball go in a random direction when starting the game or when marking a point.
We need the Random class to randomize our ball’s velocity (since it determines ball’s direction):
...
public class Ball
{
    ...

    private Random random;

    public Ball(Texture2D texture, Vector2 screenSize, float scale, Paddle playerPaddle, Paddle cpuPaddle)
    {
        ...
        random = new Random();
    }
    ...
}
Alright, first, let’s create a method that will reset the ball’s position when pressing the spacebar:
...
public class Ball
{
    ...
    public void Update()
    {
        ...
        if (KeyboardManager.IsKeyPress(Keys.Space))
        {
            ResetPosition();
        }
    }
    ...
    private void ResetPosition()
    {
        Bounds.Center = screenSize / 2f;
    }
}
Now, let’s create a method to generate a random direction:
public class Ball
{
    ...
    public Ball(Texture2D texture, Vector2 screenSize, float scale, Paddle playerPaddle, Paddle cpuPaddle)
    {
        ...

        random = new Random();
        velocity = new Vector2(RandomFloat(), RandomFloat()); // initializing
    }
    public void Update()
    {
        ...

        // the left paddle would score a point
        if (Bounds.Right < 0f)
        {
            ResetPosition();
            velocity = new Vector2(RandomFloat(), RandomFloat());
        }

        // the right paddle would score a point
        if (Bounds.Left > screenSize.X)
        {
            ResetPosition();
            velocity = new Vector2(RandomFloat(), RandomFloat());
        }

        // pressing spacebar
        if (KeyboardManager.IsKeyPress(Keys.Space))
        {
            ResetPosition();
            velocity = new Vector2(RandomFloat(), RandomFloat());
        }
    }
    ...
    private float RandomFloat()
    {
        float value = 0f;

        do
        {
            value = random.NextSingle() * 2f - 1f;
        }
        while (value > -0.5f && value < 0.5f);

        return value;
    }
}
The RandomFloat method should return a float between -1f and 1f, but not between -0.5f and 0.5f.
Why can’t the value be between -0.5f and 5.0f? Technically, it can be, but the value cannot be exactly 0.0f.
If the value were 0f, the ball would only move along one axis, resulting in a straight-line movement
instead of a diagonal. The reason for choosing a range between -0.5f and 0.5f is simple:
try setting both velocity axis to a value between -0.5f and 0.5f and see what happens.
By default, random.NextSingle() will return a value between 0.0 and 1.0.
First, we multiply the returned value by 2 and then subtract 1.
Here’s an example of the process:
// example:
0.5 * 2.0 == 1.0 - 1.0 = 0.0
// Since 0 is between -0.5 and 0.5, the while loop will execute again

0.8 * 2.0 == 1.6 - 1.0 = 0.6
// 0.6 it outside the range of -0.5 and 0.5, so it's returned
// 0.6 means that one axis will be positive (right or down)

0.3 * 2 == 0.6 - 1.0 = -0.4
// 0.4 is between -0.5 and 0.5, so the while loop will execute again

0.1 * 2 == 0.2 - 1.0 = -0.8
// -0.8 it outside the range -0.5 and 0.5, so it's returned
// -0.8 means that one axis will be negative (left or up)
After declaring this method, i call it in three places:
- When initializing the
velocityvector. - When pressing spacebar.
- When the ball goes off the screen.
Notice that during initialization, i moved the velocity initialization statement one line after
the random attribute initialization. If you don’t do this, the c# compiler (and your code editor) will complain because
you’re calling RandomFloat, which calls random.NextSingle, but at this moment, random
is still null (since you’re trying to initialize velocity before random).
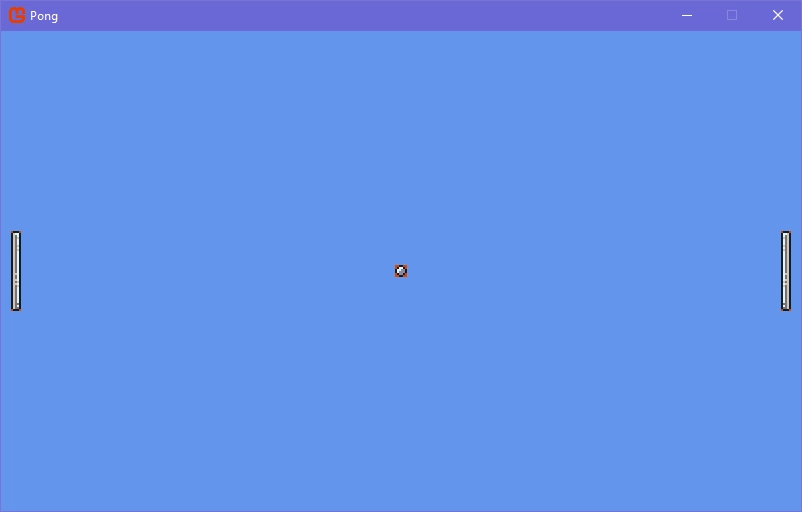
If we test now:
Hey, we’re repeating
velocity = new Vector2(RandomFloat(), RandomFloat())multiple times. So, move this to a new method and replace it in each place where it’s repeated!
Knockback Effect on the Paddle
Ok, everything essential is complete, but to really finish things off, let’s add a bounce effect (a slight knockback when the ball hits the paddle).
Go to the Paddle class and create a new Vector2 called TextureOrigin. Then, pass it to the Draw method of the SpriteBatch reference
as the Origin parameter:
public class Paddle
{
    ...
    protected Vector2 TextureOrigin;
    ...
    public Paddle(Texture2D texture, Vector2 position, float scale, Vector2 screenSize)
    {
        ...
        TextureOrigin = Vector2.Zero;
        ...
    }
    ...

    public virtual void Draw(SpriteBatch sb, Texture2D pixel)
    {
        ...
        sb.Draw(Texture, Bounds.ToRectangle(), null, Color.White, 0f, TextureOrigin, spriteEffects, 0f);
    }
    ...
}
What we’re doing do is adjust the X-axis of the texture’s origin to a positive or negative value (depending on the paddle) and reset it using linear interpolation. It’s quite simple.
To get started, set both axes of the TextureOrigin to any value between -2 and 2 that you prefer, for example:
...
TextureOrigin = new Vector2(2f, 0f);
...
This is the result:
Aqui está uma revisão do trecho com uma explicação mais clara e ajustes técnicos:
Yes, both paddles were slightly shifted to the left. Another thing you might notice while playing is that the ball ignores the paddle’s texture and only considers the paddle’s bounds during collision detection. This happens because we’re checking collisions between the ball’s bounds and the paddle’s bounds. When we move the paddle’s texture, we’re not actually moving the bounds, just the texture itself (as indicated by the orange rectangle).
However, we’re not directly repositioning the paddle’s texture. Instead, we’re adjusting the texture’s origin. This change in the texture’s origin affects how the texture is drawn, giving the illusion of movement. In other words, moving the texture’s origin is what causes the texture to appear shifted, not the actual position of the paddle’s bounds.
Understanding the Origin
A good way to understand the effect of changing the origin of an image is by rotating it.
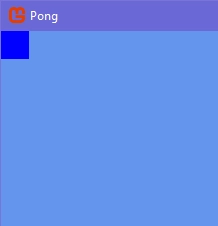
Let’s start by creating a temporary rectangle and drawing it in a specific position. This will help visualize how the origin affects the texture’s positioning:
// Paddle.cs
public class Paddle
{
    ...
    private RectangleF tempRect = new RectangleF(100f, 100f, 56f, 56f);
    public virtual void Draw(SpriteBatch sb, Texture2D pixel)
    {
        ...

        sb.Draw(pixel, tempRect.ToRectangle(), null, Color.Blue, 0f, Vector2.Zero, SpriteEffects.None, 0f);
    }
    ...
}
Now, let’s introduce a rotation variable as a float, pass it by reference to sb.Draw, and update it:
...
private float rotation = 0f;
public virtual void Draw(SpriteBatch sb, Texture2D pixel)
{
    ...

    rotation += MathHelper.ToRadians(1f); // ToRadians converts degrees to radians
    sb.Draw(pixel, tempRect.ToRectangle(), null, Color.Blue, rotation, Vector2.Zero, SpriteEffects.None, 0f);
}
When you run the code, you’ll see something like this:
If the rotation seems too slow, try increasing the value in
ToRadians(float degree)to something larger, like5f.
As you can see, when the origin is set to Vector2.Zero, the top-left corner of the texture (0,0) serves as the origin by default. This is the default origin for any texture drawn in MonoGame.
Now, let’s update the origin to the center of the texture:
...
public virtual void Draw(SpriteBatch sb, Texture2D pixel)
{
    ...
    sb.Draw(pixel, tempRect.ToRectangle(), null, Color.Blue, rotation, new Vector2(0.5f, 0.5f), SpriteEffects.None, 0f);
}
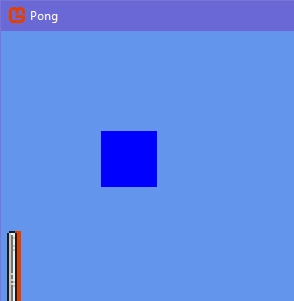
Now, the origin of our texture is set to the exact center of the texture. The (0,0) of our rectangle aligns with the center of the texture. If you set the rectangle’s position to (0,0), it will result in half of the rectangle being outside the screen and half inside:
...
private RectangleF tempRect = new RectangleF(0f, 0f, 56f, 56f);
...
Notice that the origin coordinates range from 0.0 to 1.0 for both axes. In the x-axis, 0.0 corresponds to the left side of the texture, and 1.0 corresponds to the right side. Similarly, for the y-axis, 0.0 is the top side, and 1.0 is the bottom. The value 0.5 represents the exact center for both axes.
Any value beyond 0.0 and 1.0 will shift the texture’s origin further, causing the texture to reposition as a side effect.
Finally, you can remove the temporary rectangle, the rotation variable, and the call to sb.Draw that draws the temporary rectangle.
Let’s add a few more attributes to the Paddle class:
float knockbackStrength: This will act as a multiplier to control how much the x-axis of our texture’s origin will shift.bool wasHit: A flag to determine whether the linear interpolation should run.void SetKnockback(): This method will set the texture’s origin and enable thewasHitflag, which triggers the linear interpolation.
public class Paddle
{
    ...
    protected float KnockbackStrength;
    private bool wasHit;
    public Paddle(...)
    {
        ...
        TextureOrigin = Vector2.Zero;
        KnockbackStrength = 3f; // Set the initial knockback strength
    }
    ...
    public void SetKnockback()
    {
        if (!wasHit)
        {
            TextureOrigin.X = KnockbackStrength; // Apply knockback by shifting the texture origin on the X-axis
            wasHit = true; // Mark that the paddle has been hit
        }
    }
    ...
}
Next, within the Update method, we’ll call the SetKnockback() method when the space key is pressed:
...
public virtual void Update()
{
    if (KeyboardManager.IsKeyPress(Keys.Space))
    {
        SetKnockback(); // Trigger the knockback effect
    }

    ...
}
...
Now, if we test it, you’ll see the effect of the paddles being shifted as a result of the knockback:
...
public void SetKnockback()
{
    if (!wasHit)
    {
        float shiftDirection = IsFlipX ? -1f : 1f;

        TextureOrigin.X = KnockbackStrength * shiftDirection;
        ...
    }
}
...
If we run it now:
Linear Interpolation (Lerp)
Linear interpolation (Lerp) allows us to smoothly transition the TextureOrigin.X value back to 0. It will either increase or decrease the TextureOrigin.X gradually, depending on the current value.
Let’s implement this with a new method:
...
public class Paddle
{
    ...
    public virtual void Update()
    {
        ...

        if (wasHit)
        {
            ResetPaddleOrigin();
        }

        ...
    }
    ...
    private void ResetPaddleOrigin()
    {
        TextureOrigin.X = MathHelper.Lerp(TextureOrigin.X, 0f, 0.1f);
    }
}
Now, if we test the game:
RigThis looks great, but we have two issues to address:
- The wasHit flag is never reset to false, so the effect only occurs once.
- The knockback effect can only be triggered a single time and doesn’t repeat.
Try doing the following:
...
private void ResetPaddleOrigin()
{
    ...

    if (TextureOrigin.X == 0f)
    {
        wasHit = false;
    }
}
...
Have you tested it? If so, you might have noticed that this doesn’t solve the problem. This is because of how MathHelper.Lerp works. Here’s the mathematical formula this method uses: value1 + (value2 - value1) * amount. Due to the multiplication, the most accurate way to explain this method is that it will approach our value from another value, rather than decreasing (or increasing) it until it reaches the other value
If you try printing TextureOrigin to the console, this is what you’ll see:
Notice that MathHelper.Lerp(TextureOrigin.X, 0f, 0.1f) tries to approach TextureOrigin.X from 0f, but doesn’t exactly turn it into 0.
The value
0e0is scientific notation. For example,2.36e-7is the same as2.36 * 10^-7, or0.000000236(in this specific case).
A simple way to set the value to exactly 0 is to check for a range and then set it to 0.
...
private void ResetPaddleOrigin()
{
    ...

    if (MathF.Abs(TextureOrigin.X) < 0.1f)
    {
        TextureOrigin.X = 0f;
        wasHit = false;
    }
}
The Math.Abs method removes the negative sign of any value and returns the absolute value. For example, Abs(-37) will return 37, Abs(3.14) will return 3.14, Abs(-0.5f) will return 0.5f and so on.
If we test it now:
Great, now let’s make this effect trigger when the ball hits it.
Enabling the Effect When Hitting
First, remove the call to SetKnockback from the Paddle’s Update method.
Then, in the Update method of the ball, do the following:
public class Ball
{
    ...
    public void Update()
    {
        ...

        if (Bounds.Intersects(playerPaddle.Bounds) && velocity.X < 0f)
        {
            velocity.X *= -1f;
            playerPaddle.SetKnockback();
        }

        if (Bounds.Intersects(cpuPaddle.Bounds) && velocity.X > 0f)
        {
            velocity.X *= -1f;
            cpuPaddle.SetKnockback();
        }

        ...
    }
    ...
}
Finally, if we test it:
End
Perfect, this is all we need for now.
If you managed to get this far with everything working well, then… Congratulations 🎉
You are ready the next part:
Click to read Part 4 | Creating the Paddle AI and Increasing Ball Speed
🔮 Any question or suggestion, send me a message at:
👾 You can find the source code on Github